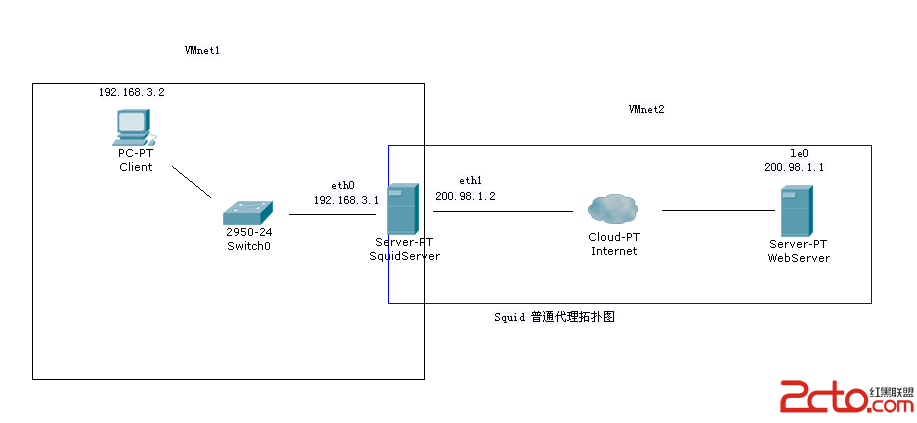
網絡配置如上圖所示 Squid使用CentOS5.8+squid,web服務器使用FreeBSD+nginx進行試驗。
本地網絡使用VMnet1進行模擬,公網使用VMnet2進行模擬,IP規劃如上圖。
首先安裝web服務器,網絡選擇接入Vmnet2.
pkg_add -r //安裝nginx
ifconfig le0 200.98.1.1 netmask 255.255.255.0 up //配置網絡
/usr/local/rc.d/nginx start //啟動nginx進程
至此 web服務器准備完畢。
www.2cto.com
接下來准備squid代理服務器。
1.安裝squid軟件
#yum -y install squid
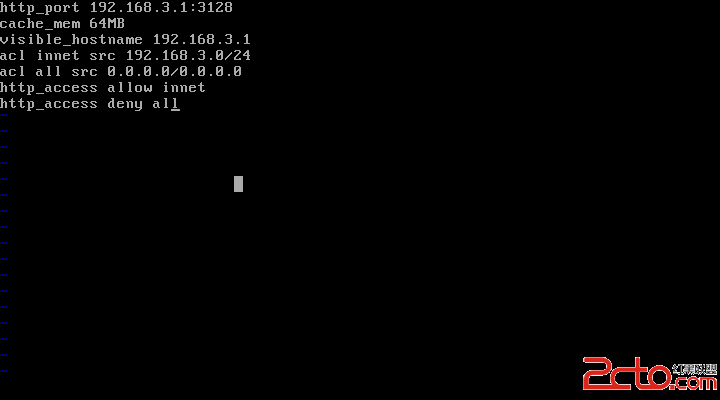
2.配置/etc/squid/squid.conf文件的書寫
http_port 192.168.3.1:3128 //代理服務器開啟端口設置
visible_hostname 192.168.3.1 //代理服務器標示(必須配置,否則會報錯)
//配置ACL(必須)
acl innet src 192.168.3.0/24
acl all src 0.0.0.0/0.0.0.0
http_access allow innet
http_access deny all
3.配置服務器網絡 www.2cto.com
ifconfig etho 192.168.3.1 netmask 255.255.255.0 up
ifconfig eth1 200.98.1.2 up

4.啟動squid代理服務端 service squid start 5.關閉防火牆 iptabes iptables -F 至此 squid服務器准備完畢 最後配置客戶端浏覽器
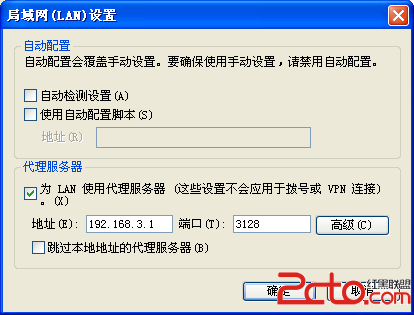
測試,成功訪問到之前架設的web服務器 www.2cto.com


