用於linux 和linux 之間或者linux和unix之間
將nfs服務器的共享文件夾掛載到客戶端,使用協議RPC(遠程進程調度)
www.2cto.com

NFS使用rpc
1.當服務器端的nfs和rpc 服務 啟動後會形成很多進程:mountd ,nfs,nlockmgr,status進程。
2. 客戶端有rpc.mountd ,rpciod , nlockmgr,status進程。
3.客戶端需要掛載服務器端的文件,使用rpc.mountd進程項服務器的portmapper 發送請求連接。
4.服務器端的portmapper 收到請求後,向客戶端回應,同時告訴客戶端使用哪個端口與服務器相連。
5.客戶端使用rpc.mountd 請求服務器端進程mountd,進行掛載。
6.掛載完畢後,客戶端使用進程rpciod 調用服務端的nfs進程,進行磁盤io操作。
7.兩端都調用nlockmgr鎖機制,當服務器端在編寫文檔時,禁止客戶端的訪問。
8. 為了維持連接,兩端都使用status進程。
www.2cto.com
查看本機nfs
[root@localhost ~]# rpm -qa |grep nfs
nfs-utils-lib-1.0.8-7.6.el5
nfs-utils-1.0.9-42.el5
[root@localhost ~]# service nfs start 啟動
查看自己進程:
[root@localhost ~]# mkdir /public 建立文件夾
[root@localhost ~]# cd /public
[root@localhost public]# touch fi.txt
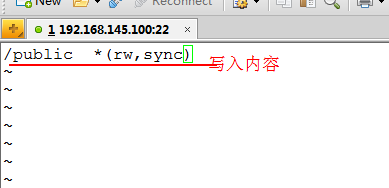
[root@localhost ~]# vi /etc/exports 編輯
[root@localhost ~]# service nfs restart
另打開一台linux虛擬機:地址為192.168.145.200
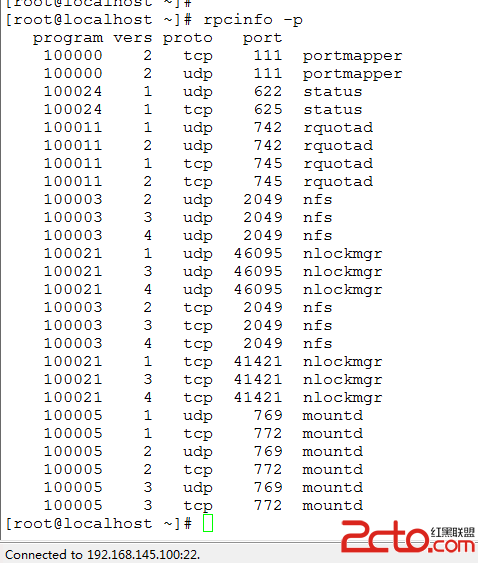
[root@localhost ~]# rpcinfo -p 192.168.145.100
[root@localhost ~]# showmount -e 192.168.145.100 查看145.100上的共享文件
Export list for 192.168.145.100:
/public *
[root@localhost ~]#
將192.168.145.100上的共享文件掛載到自己的/mnt/public/上
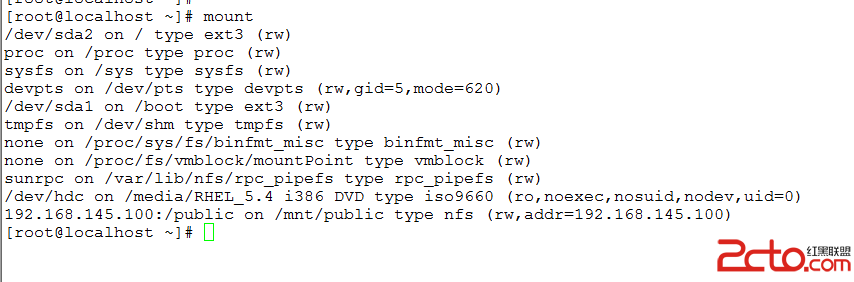
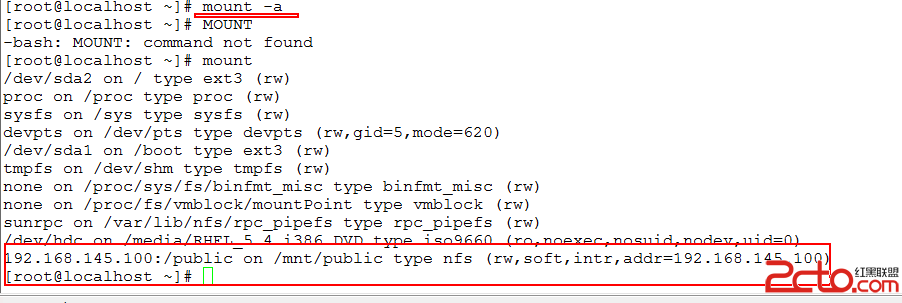
[root@localhost ~]# mount 192.168.145.100:/public /mnt/public
在客戶端上(192.168.145.200)實現自動掛載;
[root@localhost ~]# vi /etc/fstab
加入以下內容
192.168.145.100:/public /mnt/public nfs defaults,soft,intr 0 0
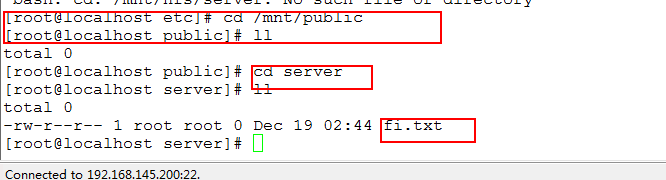
[root@localhost public]# pwd
/mnt/public

因為這時就在掛載目錄上/mnt/public/所以就卸載不了了。
可以這樣做:
[root@localhost public]# fuser -v /mnt/public
USER PID ACCESS COMMAND
/mnt/public: root 4602 ..c.. bash
[root@localhost public]# fuser -kv /mnt/public
敲完之後直接跳出來,然後再進去執行
發現卸掉了
下面實現控制時間掛載:
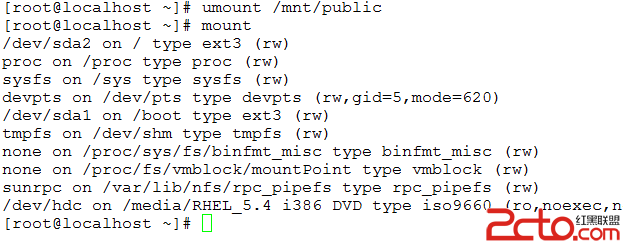
[root@localhost ~]# umount /mnt/public
進入/etc/fstab把裡面加的內容刪除了。
編輯/etc/auto.master文件可以借助命令chkconfig –list |grep auto來查看幫助文檔

[root@localhost ~]# cd /etc
[root@localhost etc]# ls auto*
autofs_ldap_auth.conf auto.master auto.misc auto.net auto.smb
[root@localhost etc]# cp auto.misc auto.nf
[root@localhost etc]# vi auto.nfs 編輯
添加以下內容:

[root@localhost etc]# service autofs restart 重啟服務
Stopping automount: [ OK ]
Starting automount: [ OK ]
[root@localhost etc]#
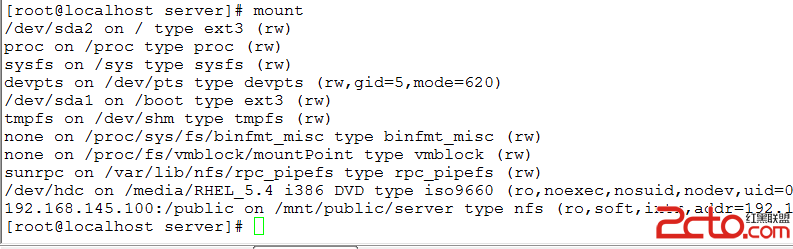
查看掛載上了:
等一分鐘後在查看發現沒有了:


